Server
Setting up web a server on ESP8266 requires very little code and is surprisingly straightforward. This is thanks to functionality provided by the versatile ESP8266WiFi library.
The purpose of this example will be to prepare a web page that can be opened in a web browser. This page should show the current raw reading of ESP’s analog input pin.
Table of Contents
- The Object
- The Page
- Header First
- The Page is Served
- Get it Together
- Get it Run
- What Else?
- Conclusion
The Object
We will start off by creating a server object.
WiFiServer server(80);
The server responds to clients (in this case - web browsers) on port 80, which is a standard port web browsers talk to web servers.
The Page
Then let’s write a short function prepareHtmlPage(), that will return a String class variable containing the contents of the web page. We will then pass this variable to server to pass it over to a client.
String prepareHtmlPage()
{
  String htmlPage =
     String("HTTP/1.1 200 OK\r\n") +
            "Content-Type: text/html\r\n" +
            "Connection: close\r\n" +  // the connection will be closed after completion of the response
            "Refresh: 5\r\n" +  // refresh the page automatically every 5 sec
            "\r\n" +
            "<!DOCTYPE HTML>" +
            "<html>" +
            "Analog input:  " + String(analogRead(A0)) +
            "</html>" +
            "\r\n";
  return htmlPage;
}
The function does nothing fancy but just puts together a text header and HTML contents of the page.
Header First
The header is to inform client what type of contents is to follow and how it will be served:
Content-Type: text/html
Connection: close
Refresh: 5
In our example the content type is text/html, the connection will be closed after serving and the content should be requested by the client again every 5 seconds. The header is concluded with an empty line \r\n. This is to distinguish header from the content to follow.
<!DOCTYPE HTML>
<html>
Analog input:  [Value]
</html>
The content contains two basic HTML tags, one to denote HTML document type <!DOCTYPE HTML> and another to mark beginning <html> and end </html> of the document. Inside there is a raw value read from ESP’s analog input analogRead(A0) converted to the String type.
String(analogRead(A0))
The Page is Served
Serving of this web page will be done in the loop() where server is waiting for a new client to connect and send some data containing a request:
void loop()
{
  WiFiClient client = server.available();
  if (client)
  {
    // we have a new client sending some request
  }
}
Once a new client is connected, server will read the client’s request and print it out on a serial monitor.
while (client.connected())
{
  if (client.available())
  {
    String line = client.readStringUntil('\r');
    Serial.print(line);
  }
}
Request from the client is marked with an empty new line. If we find this mark, we can send back the web page and exit while() loop using break.
if (line.length() == 1 && line[0] == '\n')
{
    client.println(prepareHtmlPage());
    break;
}
The whole process is concluded by stopping the connection with client:
client.stop();
Put it Together
Complete sketch is presented below.
#include <ESP8266WiFi.h>

const char* ssid = "********";
const char* password = "********";

WiFiServer server(80);


void setup()
{
  Serial.begin(115200);
  Serial.println();

  Serial.printf("Connecting to %s ", ssid);
  WiFi.begin(ssid, password);
  while (WiFi.status() != WL_CONNECTED)
  {
    delay(500);
    Serial.print(".");
  }
  Serial.println(" connected");

  server.begin();
  Serial.printf("Web server started, open %s in a web browser\n", WiFi.localIP().toString().c_str());
}


// prepare a web page to be send to a client (web browser)
String prepareHtmlPage()
{
  String htmlPage =
     String("HTTP/1.1 200 OK\r\n") +
            "Content-Type: text/html\r\n" +
            "Connection: close\r\n" +  // the connection will be closed after completion of the response
            "Refresh: 5\r\n" +  // refresh the page automatically every 5 sec
            "\r\n" +
            "<!DOCTYPE HTML>" +
            "<html>" +
            "Analog input:  " + String(analogRead(A0)) +
            "</html>" +
            "\r\n";
  return htmlPage;
}


void loop()
{
  WiFiClient client = server.available();
  // wait for a client (web browser) to connect
  if (client)
  {
    Serial.println("\n[Client connected]");
    while (client.connected())
    {
      // read line by line what the client (web browser) is requesting
      if (client.available())
      {
        String line = client.readStringUntil('\r');
        Serial.print(line);
        // wait for end of client's request, that is marked with an empty line
        if (line.length() == 1 && line[0] == '\n')
        {
          client.println(prepareHtmlPage());
          break;
        }
      }
    }
    delay(1); // give the web browser time to receive the data

    // close the connection:
    client.stop();
    Serial.println("[Client disonnected]");
  }
}
Get it Run
Update ssid and password in sketch to match credentials of your access point. Load sketch to ESP module and open a serial monitor. First you should see confirmation that module connected to the access point and the web server started.
Connecting to sensor-net ........ connected
Web server started, open 192.168.1.104 in a web browser
Enter provided IP address in a web browser. You should see the page served by ESP8266:
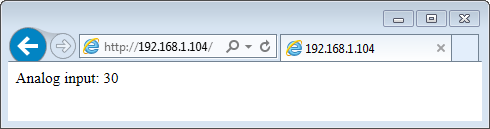
The page would be refreshed every 5 seconds. Each time this happens, you should see a request from the client (your web browser) printed out on the serial monitor:
[Client connected]
GET / HTTP/1.1
Accept: text/html, application/xhtml+xml, */*
Accept-Language: en-US
User-Agent: Mozilla/5.0 (Windows NT 6.1; WOW64; Trident/7.0; rv:11.0) like Gecko
Accept-Encoding: gzip, deflate
Host: 192.168.1.104
DNT: 1
Connection: Keep-Alive
[client disonnected]
What Else?
Looking on client examples you will quickly find out the similarities in protocol to the server. The protocol starts with a header that contains information what communication will be about. It contains what content type is communicated or accepted like text/html. It states whether connection will be kept alive or closed after submission of the header. It contains identification of the sender like User-Agent: Mozilla/5.0 (Windows NT 6.1), etc.
Conclusion
The above example shows that a web server on ESP8266 can be set up in almost no time. Such server can easily stand up requests from much more powerful hardware and software like a PC with a web browser. Check out other classes like ESP8266WebServer that let you program more advanced applications.
If you like to try another server example, check out WiFiWebServer.ino, that provides functionality of toggling the GPIO pin on and off out of a web browser.
For the list of functions provided to implement and manage servers, please refer to the Server Class documentation.